GCP+V2ray+WebSocks+tls to surfing
Today, i will share how to comfortably surfing by build GCP+V2ray+WebSocks+tls.
It sounds difficult, but it is real complex, please pay a attention to follow me.
Content:
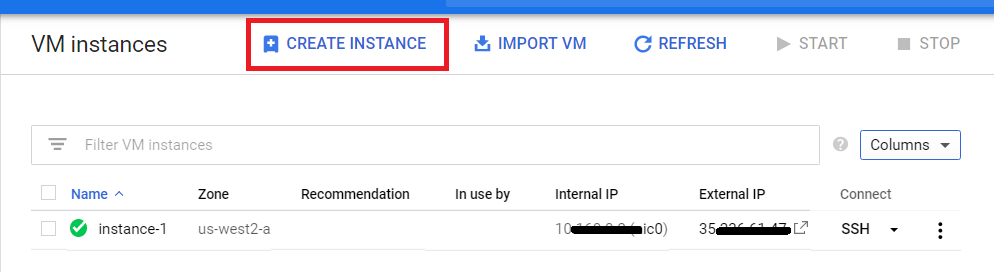
1. You should have a abroad server, i recommend Google Cloud Platform
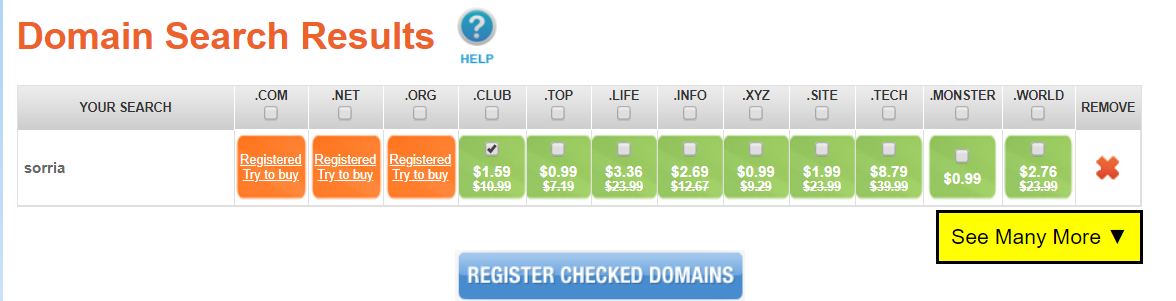
2. You need a international domain,you can buy one easy and cheap
3. Analysis your domain to your VPS and add CDN and DNSSEC
4. Product verification
5. Add TXT record for your VPS
6. Output configuration file
Before start do it, i want to suggest that it may take long time to do it, so i will you can insist to end.
Let us start.
1. You should have a abroad server, i recommend Google Cloud Platform.
The reasons why i recommand this platform are that it will give you one year and $300 to use its server for free only need a Visa Card. i believe your all partners who may exist a person has Visa Card. unfortunately, i only recommand Vultr.
1): Configure your VPS:
-
Creat a new one.
-
Recommand Los Angeles, memory > 1G, CentOS 7.
-
Opent your server firewall and cloud safe group(if you feel trouble you can close firewall), open 22, 80, 443.
$ sudo -i$ passwdvim /etc/ssh/sshd_confset allow root to login to yes$ systemctl start firewall.service$ firewall-cmd --zone=public --parmanent --add-port=443/tcp$ systemctl restart firewall.service -
After complete, you can use Xshell to login
-
You also see his blog to get more details
2. You need a international domain,you can buy one at namesilo.
1): Regester a domain and this site it support AliPay, so it is very nice.
2): Into the interface of Manage Your Domain.

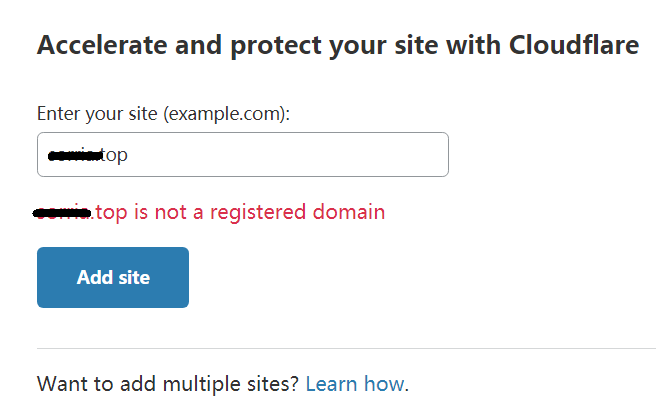
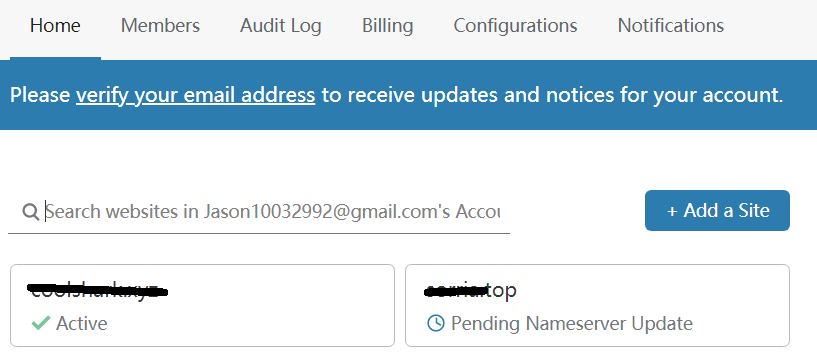
3. Analysis your domain to your VPS and add CDN and DNSSEC.
1): Go to Cloudflare to analysis your domain for free(you may get trouble like this, do not worried and wait a while).
2): The first domain has been analysised but the secend one is not complete, so wait a while.
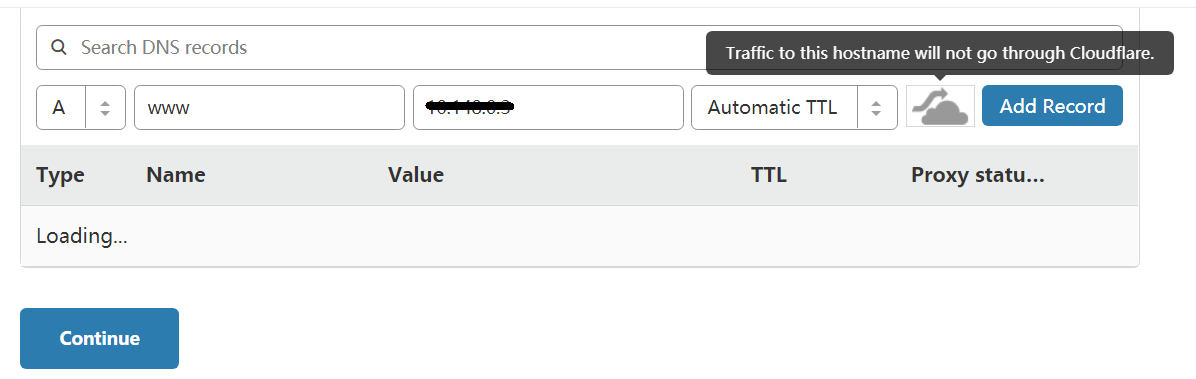
3): Add A record for your server.
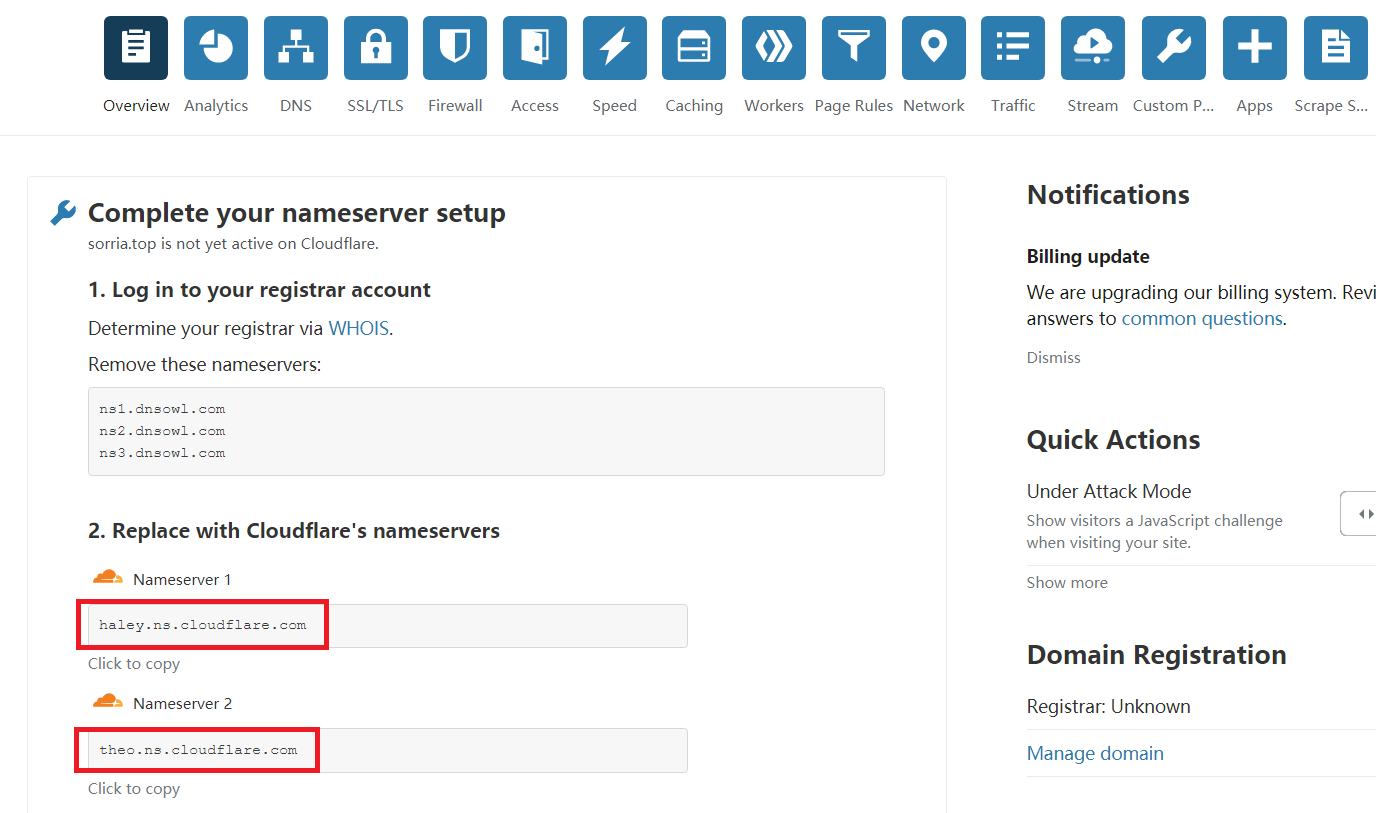
4): In Cloudflare web page, using following two DNS servers to Namesilo web page.
5): In Namesilo web page, into interface of Change Nameservers.
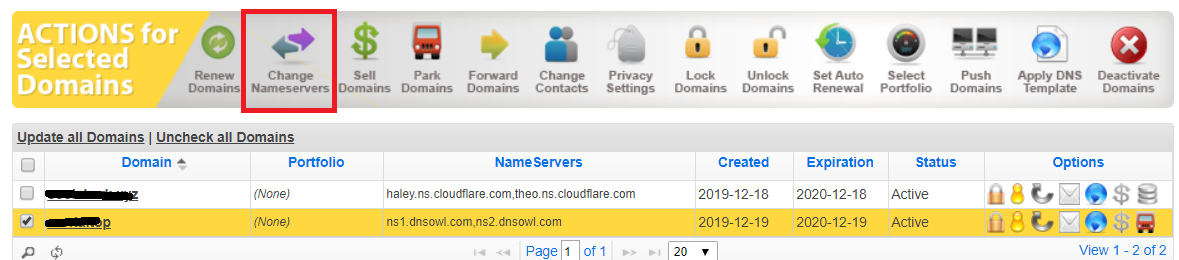
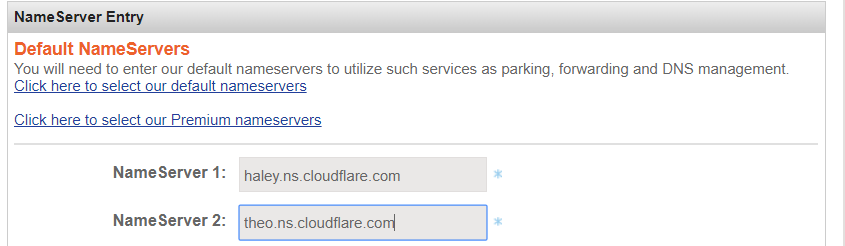
6): Change nameservers.
7): In Cloudflare web page, into interface of DNS.
8): In Cloudflare web page, find DBSSEC and add its information to Namesilo web page.

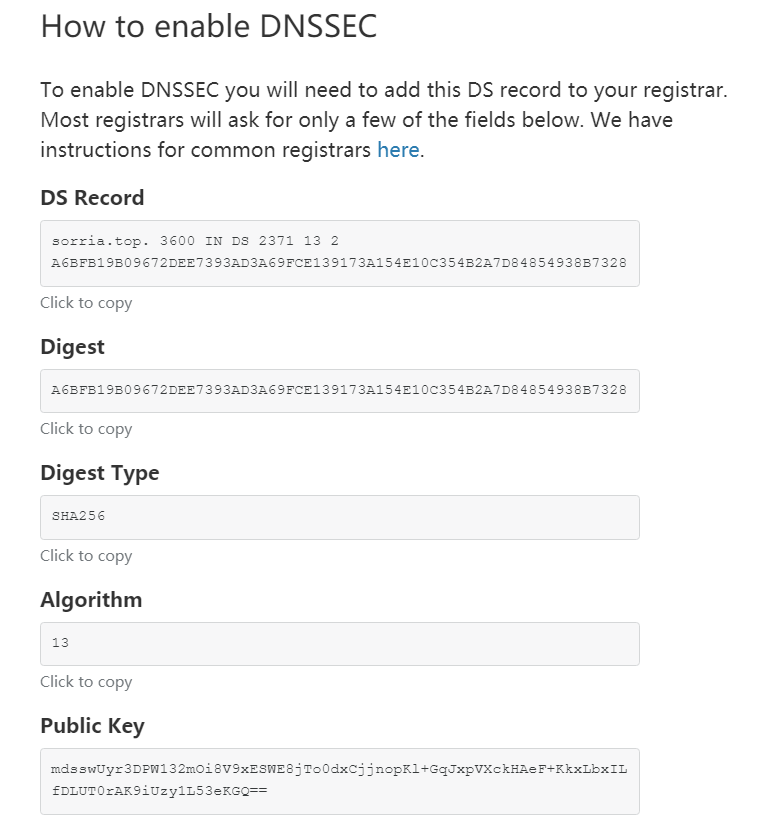
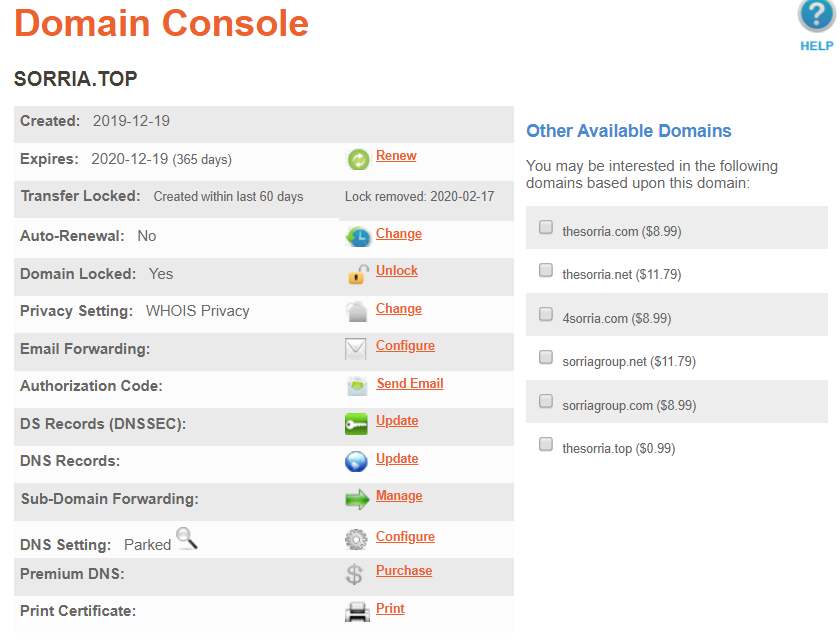
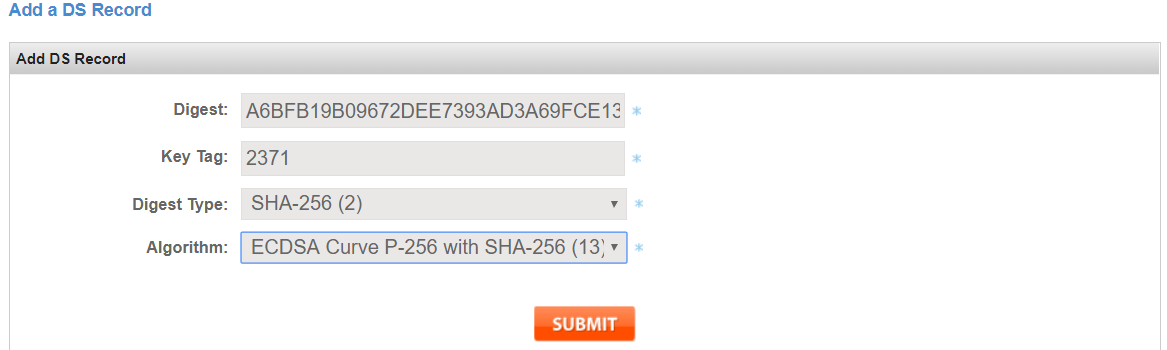
9): In Namesilo, find DS Records and add some DNSSEC information.
10): Match information.
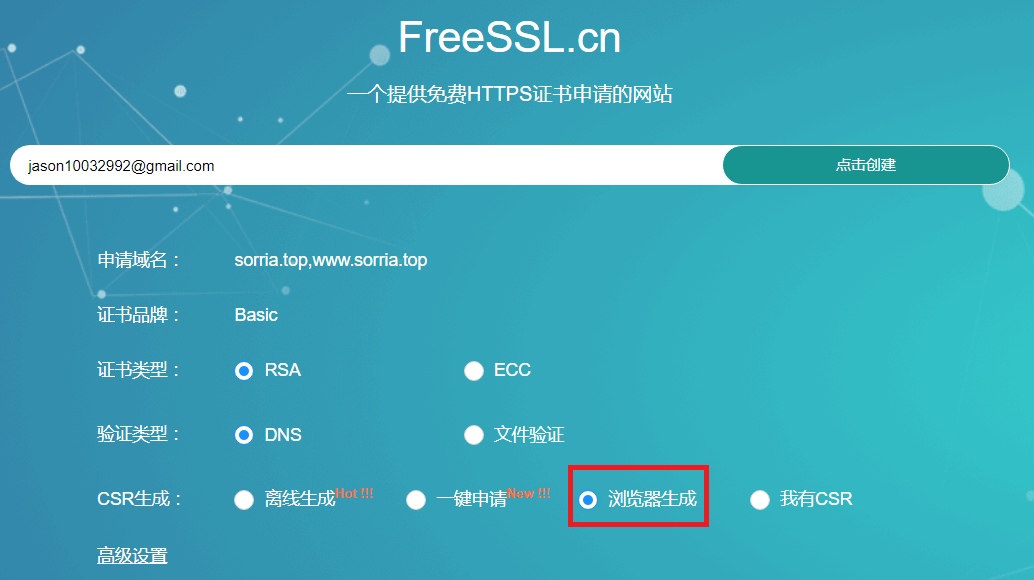
4. Product verification.
Use FreeSSL to product verification for free.
5. Add TXT record for your VPS.
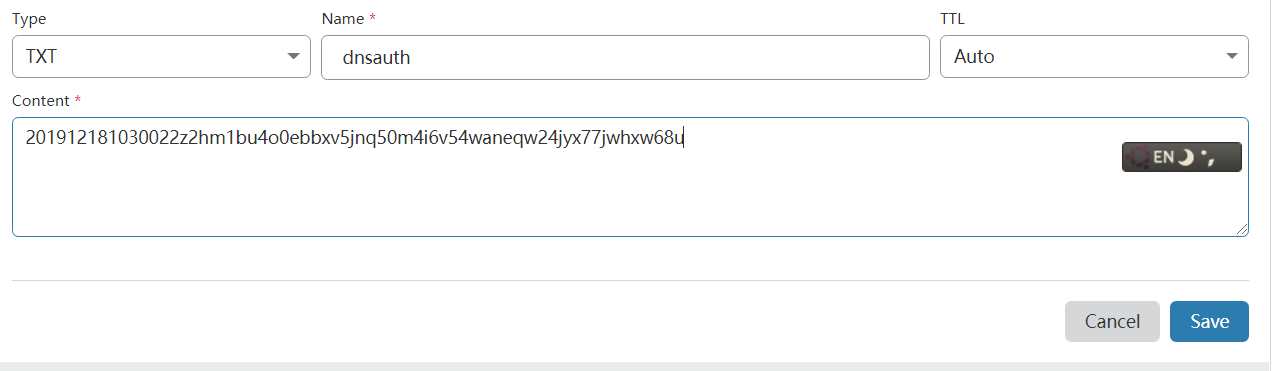
1): Add a TXT record at Cloudflare web page using this information.
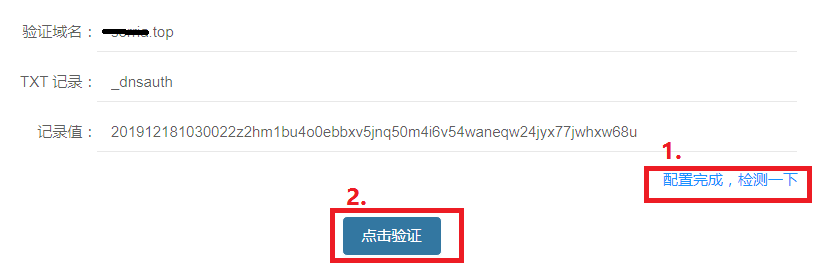
- After add this information, first to click 1 to check, if the results are similar as following picture(at least two matchs), you can click 2 to continue.
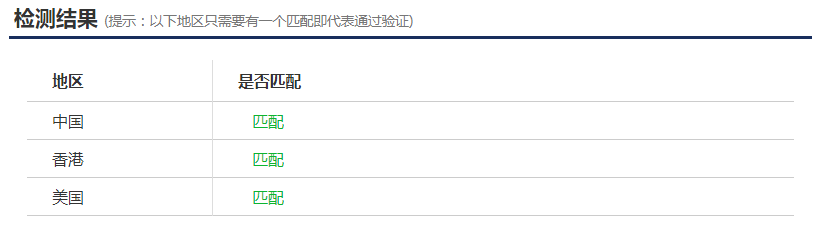
- if your steps era right, you will get something are similar as the following picture.
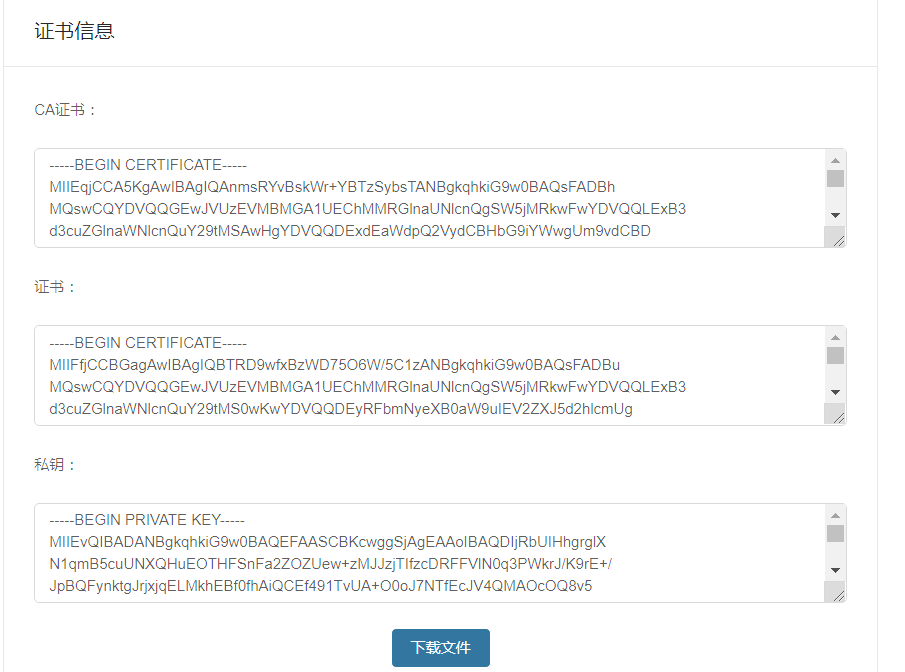
2): Copy the conents of your private key into a txt file and rename it to your-domain.key.(such as xxoo.key)
3): Copy the conents of your CA into a txt file and rename it to your-domain.pem.(xxoo.pem)
4): The two file are your veritification end private key.
6. Output configuration file.
1): Use this tool to auto product json file.
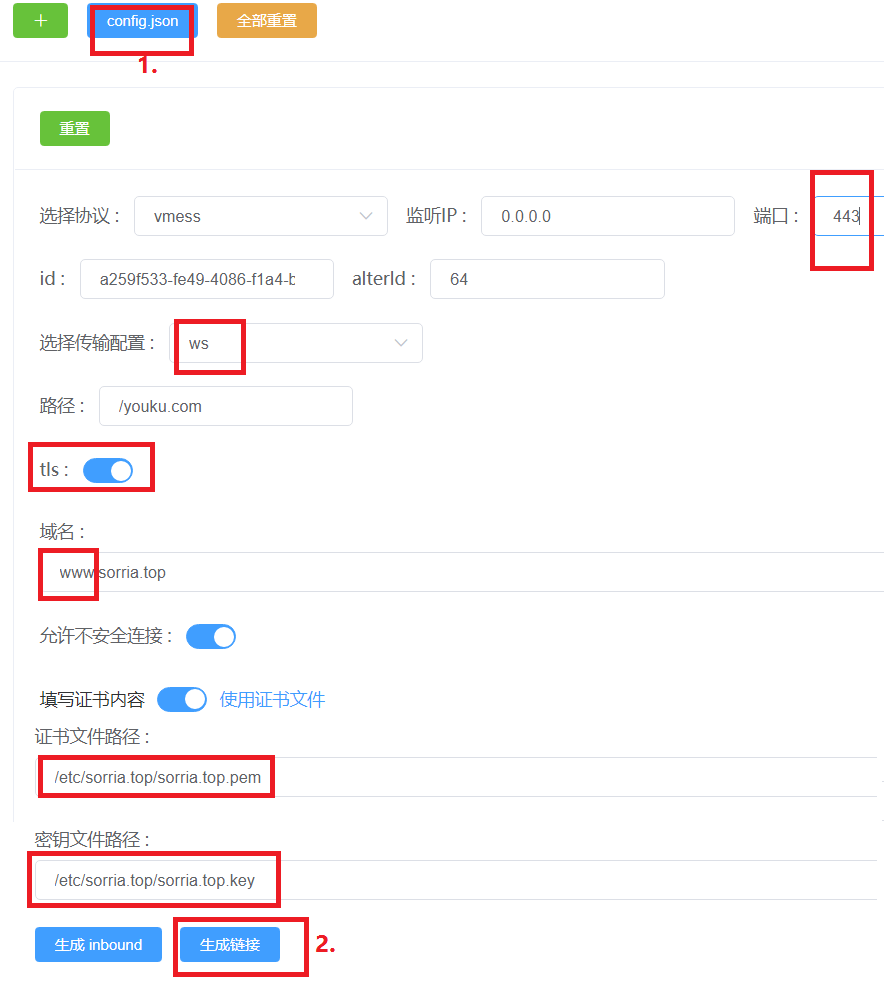
2): Click 1 to product JSON file and click 2 to product QR code
3): If you still follow me to there, you will get a JSON file that is V2ray needs, a KEY file and a PEM file.
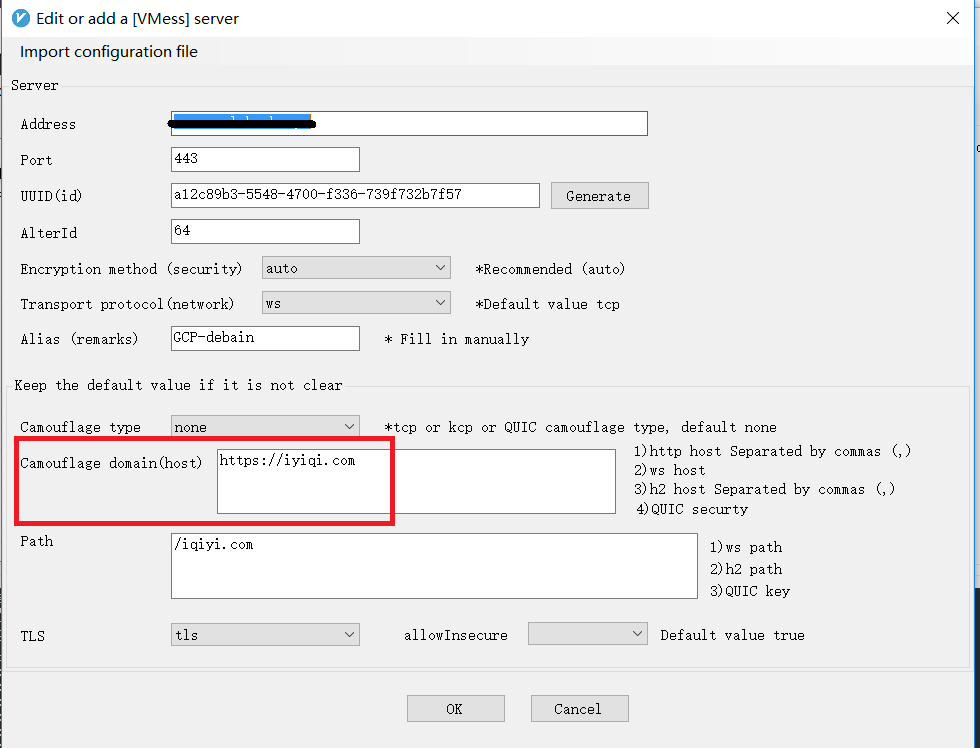
7. Test with V2ray on Window10 and Linux.
1): Entrance your IPS server and configure it again.
su root
- Startup BBR.
echo "net.core.default_qdisc=fq" >> /etc/sysctl.conf
echo "net.ipv4.tcp_congestion_control=bbr" >> /etc/sysctl.conf
sysctl -p
sysctl net.ipv4.tcp_available_congestion_control
lsmod | grep bbr
- Install V2ray.
bash <(curl -L -s https://install.direct/go.sh)
- Create directory.
mkdir /etc/your-domain such as /etc/xxoo.com
-
Copy json file to
/etc/v2rayand copy KEY file and PEM file to/etc/your-domain/. -
Startup V2ray.
systemctl restart v2ray.service
2): Install V2ray under Window10.
-
Download V2ray-windows-64.zip and V2rayN.zip.
-
Unzip the V2rayN.zip and you will get V2rayN.exe which you should put it to the directory of V2ray-windows-64.
-
Startup your V2rayG and configure it, this domain is your pretend address for which i recommand you add a vedio address because your VPS should run always.
3): Install V2ray under Linux.(you can see this article to view more details how to configure it)
- test speed
$ wget https://raw.github.com/sivel/speedtest-cli/master/speedtest.py
$ chmod a+rx speedtest.py
$ mv speedtest.py /usr/local/bin/speedtest
$ chown root:root /usr/local/bin/speedtest
$ speedtest
If you have any problems, you can contact with me and send it to me.
coolshark@sorria-linux.club
jason10032992@gmail.com